
GrooveMachine is a National Science Foundation funded museum exhibit that teaches kids core computer science concepts through musical interaction. The multidisciplinary team (developers, industrial designers, and musicians) was led by Astrid Bin, Postdoctoral Fellow researcher in Digital Media and the Center for Music Technology at Georgia Tech. My main tasks were designing and rapid prototyping using CAD software, 3D printer, and electronics. The project was exhibited at Museum of Science and Industry, Chicago, on July 2018.

The physical blocks work as snippets of code. Note blocks (blue) connected to the central hub act as individual notes in a looping/repeating musical sequence (beats and melody). The modifier blocks (red, orange, and green) connected behind these note blocks act as a sound effect/manipulator, such as reverse, filter, and chorus.
The blocks light up when connected appropriately. Each block also contains a microchip so that the master computer knows which block is connected.

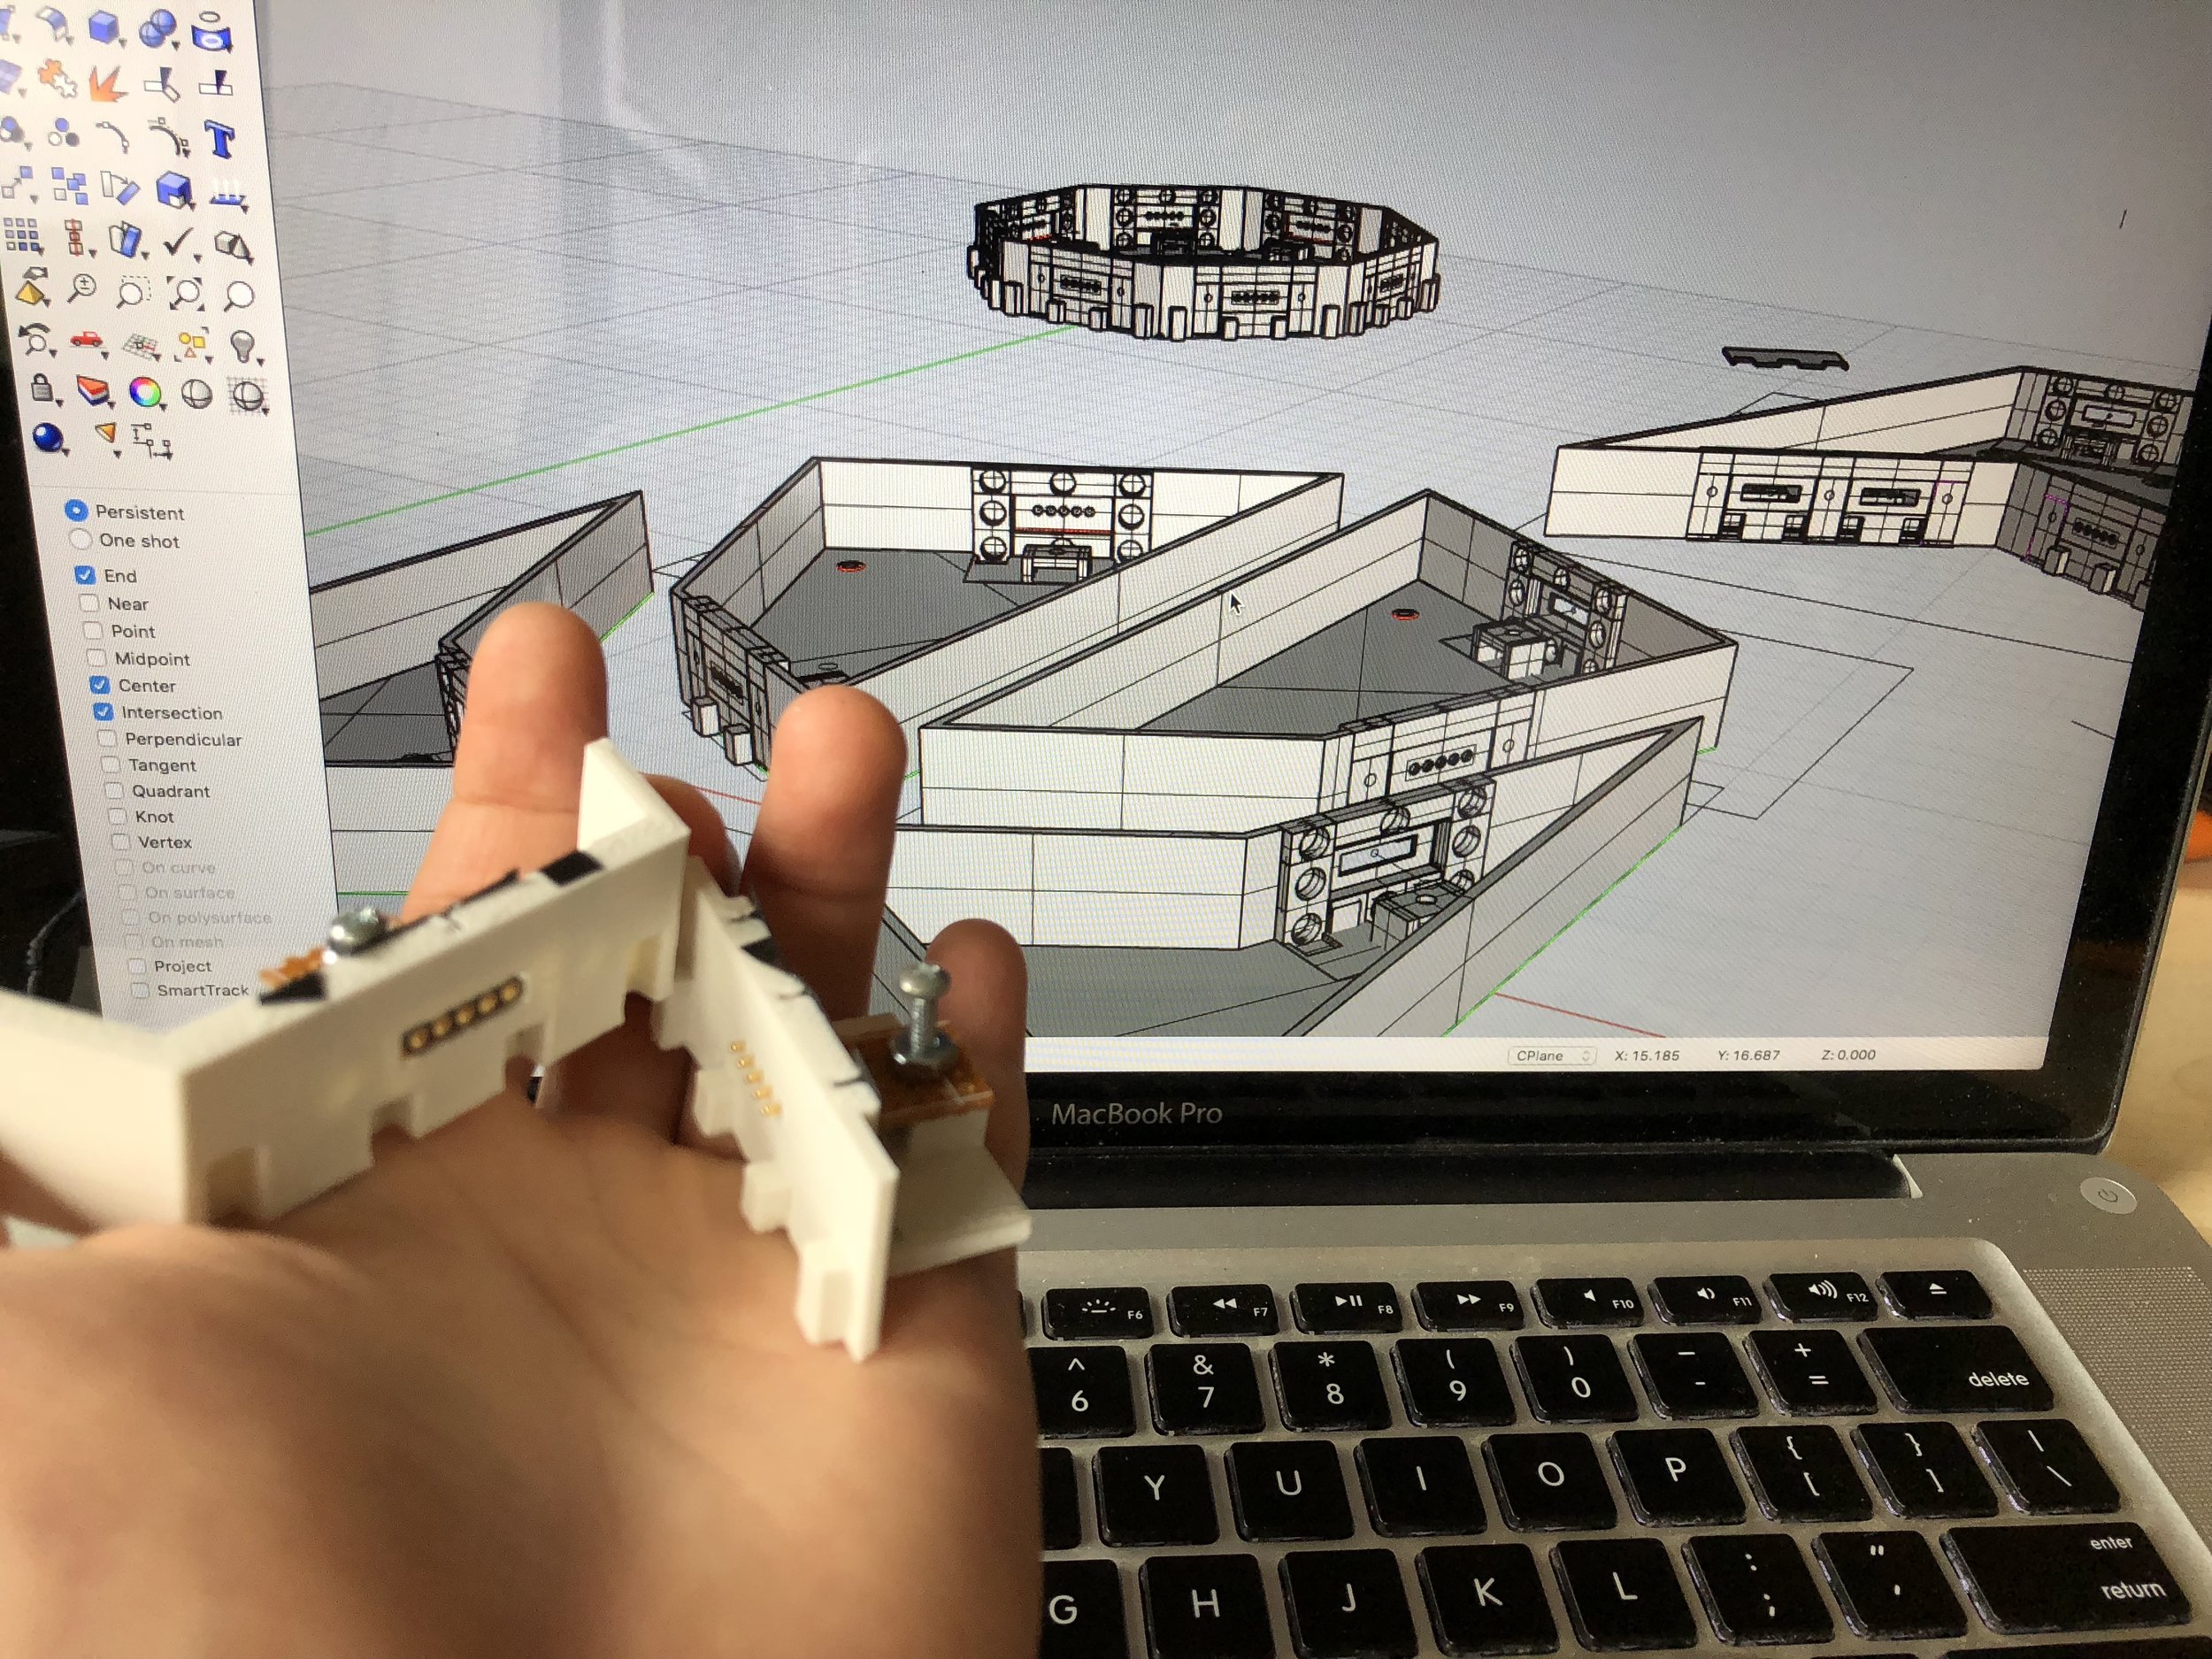
I mainly used Rhino to 3D model the blocks. Test models were 3D printed with Georgia Tech’s printer. After the designs were finalized, I sent the STL files to a local 3D printing manufacture for a mass production print.

Analyzing littleBits (https://littlebits.com/)
My challenge was to design a mechanism that will connect the blocks together. Main requirements were:
-Easy and intuitive for kids to connect the pieces like a puzzle
-Robust connection
-Making sure the circuits in each block connects (completing/extending a circuit)
I took apart and analyzed the module by littleBits (https://littlebits.com/) for this project. The connector mechanism mainly consists of magnets, male and female tabs, and spring loaded pins.
DESIGN DECISIONS AND PROCESSES
BIG VS SMALL PINS

In the beginning, I worked with big pins (shown left) since I thought that it would be easier for the pins to connect with each other due to bigger area of contact. The issue was that they require stronger magnetism to push the spring-loaded pins all the way in. This makes it challenging to make sure that all 5 pins are connected robustly.
I eventually settled with small pins for the following reasons:
-Only requires weak magnetism for a robust connection
-Cheaper
-I can solder it directly to a perf board.
MALE TO MALE CONNECTION VS MALE TO FEMALE CONNECTION


Early model. Two sets of 5-male pins connecting with each other proved not ideal.
I initially worked with two male pins connecting with each other just like littleBits. Though that approach works for connectors with fewer (and smaller) pins, the issue was that it was difficult to align all 5 pins perfectly. In addition, stronger magnetism was required to push two sets of male spring-loaded pins all the way in; connection was not robust. So, I started using female pins, which successfully resulted in a stronger connection since female pins do not contain spring-loaded pins.
In addition, having male and female pins makes it easier for users to visually see which pieces go together.
TABS

Tabs on connectors help the pieces align appropriately. In addition, it can be used to make sure that unintended connections do not happen. For example, the modifier blocks are intended to be connected to the note block and not the central hub, so I decided to have 4 male tabs for the center hub piece. Modifier blocks only have 2 female tabs, so it cannot be connected to the center piece due to the extra 2 male tabs pushing them away.

I reshaped the male tabs connecting the note and modifier blocks into a triangle (as shown in the CAD photo above) instead of a rectangle. When two modifiers are each connected to left and right side of a single note piece (as shown in the photo above), it was challenging to remove only one of the modifiers when the male tab was a rectangle. With the triangle shape, you can slide the modifier off of the note piece a lot easier.

paper layout

Digital sketch/layout

modelling with clay

meetings

table designed and built by Bruno, team’s industrial designer.
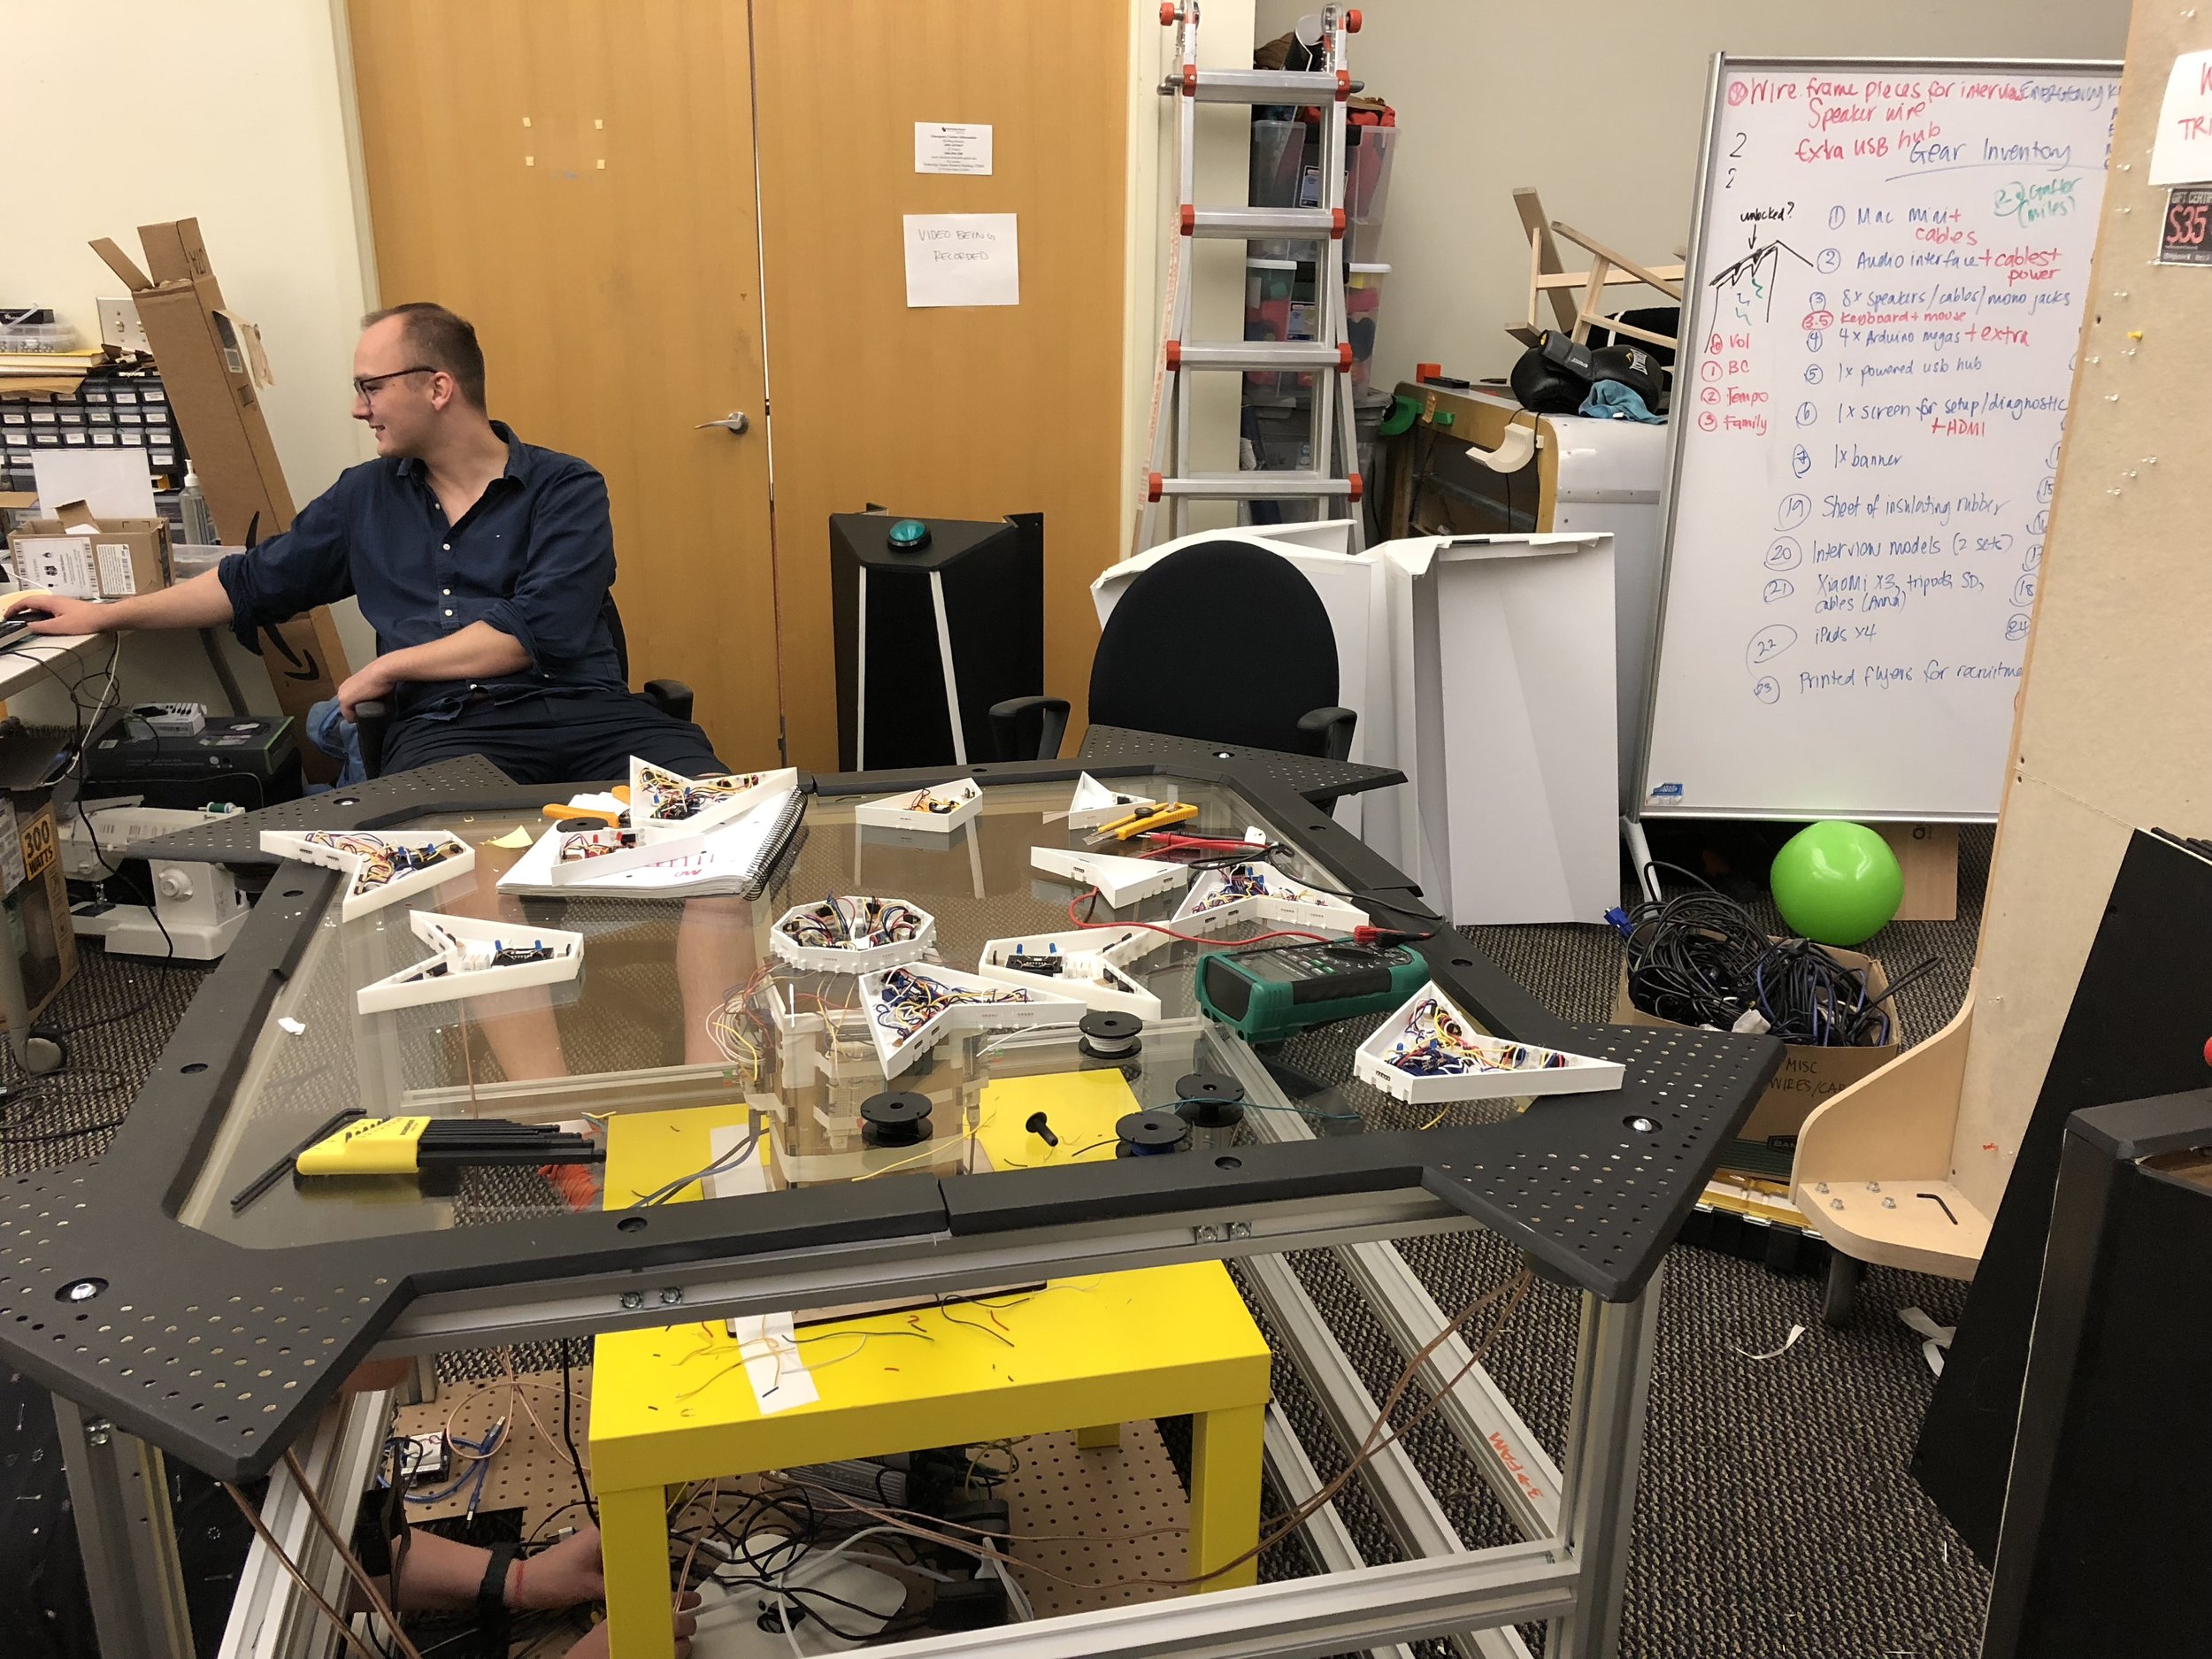
scene from the lab. Richard, team’s musical composer, looking happy as the project is coming together!